Homeschool mamas are always on the lookout for fun and educational crafts to do with kids. With St. Patrick’s Day just around the corner, I thought it would be the perfect opportunity to make a 3D shamrock craft for kids post and share it with you. I know my St. Patrick’s Day Preschool Pack Free and Premium versions were a hit, so let’s do some more around this theme.
St. Patrick’s Day has always been a kind of a big deal in my family growing up. As I write this, my mom’s house is covered in green decorations. It’s our favorite time of year and we go all out. So let’s have some fun and get crafty, after all there are so many benefits to crafting with your kids.

Contents
- 1 Here are a few of the benefits of doing crafts with kids:
- 2 Step 1: Gather Your Supplies
- 3 Step 2: Cut Out Your Strips
- 4 Step 3: Fold Your Strips to make hearts
- 5 Step 4: Glue Your Shamrocks Together
- 6 Step 5: You can punch holes in the top and add yarn to hang them if you wish.
- 7 Step 6: Display Your 3D Shamrock Craft for Kids
Here are a few of the benefits of doing crafts with kids:
- Encourages creativity: Crafting allows kids to express their creativity and imagination. It can help them explore new ideas and ways of thinking.
- Develops fine motor skills: Crafting involves a lot of cutting, gluing, and manipulating small objects, which helps develop fine motor skills and hand-eye coordination.
- Builds self-esteem: Creating something with their own hands can give kids a sense of accomplishment and boost their self-esteem.
- Promotes problem-solving skills: When crafting, kids often encounter challenges that require problem-solving skills. Figuring out how to make something work or fit together can be a great exercise in critical thinking.
- Fosters family bonding: Crafting together can be a great way to spend quality time with your kids. It allows you to connect with them in a meaningful way and create memories together.
- Provides a break from technology: In today’s digital age, it can be refreshing to unplug and engage in a hands-on activity like crafting.
Getting crafty with your kids can be a fun and rewarding experience for the whole family. It can help foster a love of creativity and learning that will help them grow into well-rounded people.
Here’s what you’ll need to make this 3D Shamrock Craft for Kids:
- Green and white construction paper
- Scissors or Paper Cutter
- Glue Gun or Glue

Step 1: Gather Your Supplies
First things first, gather all of the materials you will need for this craft. You can purchase green and white construction paper at your local craft store or use what you have on hand. You will also need a pair of scissors or a paper cutter, glue and a pencil.
Step 2: Cut Out Your Strips
Next, use the green construction paper to cut out three 1 1/2 inch strips of paper about 10 inches long or however long the long side of paper is. This will be used for the outer part of the shamrock.
Then, use the white construction paper to cut out three 1 1/2 inch strips about 8 inches long.

Step 3: Fold Your Strips to make hearts
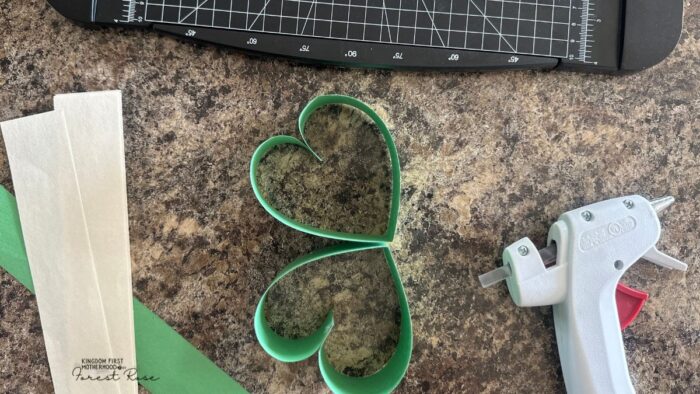
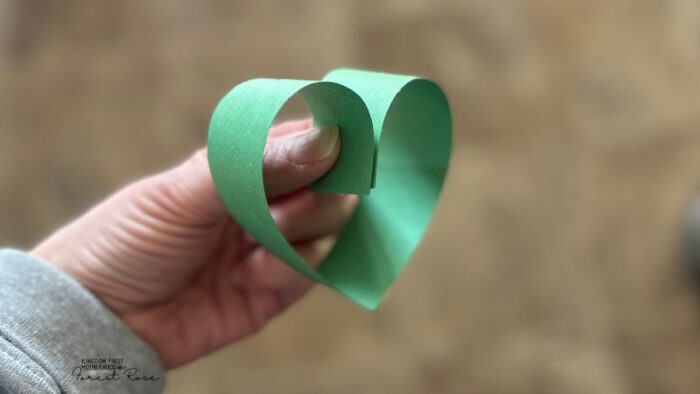
Once you have cut out all of your shamrocks, it’s time to fold them. Take each of the strips and fold them in half down the center. This will create a crease for the bottom of the heart. Then fold and glue the ends together to form hearts out of all the strips, green and white. You should then have 3 green hearts and 3 smaller white hearts.

Step 4: Glue Your Shamrocks Together
Now it’s time to start assembling your 3D shamrock! Lining up the creases, glue the white hearts inside the green hearts. Hold it in place until the glue has dried. You should have a white heart glued inside each green heart.
Next, apply glue to the bottom right of one of the green hearts to attach the stem.
Then, glue the hearts together to form the Shamrock or 3-leaf clover.
Step 5: You can punch holes in the top and add yarn to hang them if you wish.
Now that your shamrocks are assembled, it’s time to decorate them! You can add glitter, stickers, or any other embellishments you like to make them your own.
Step 6: Display Your 3D Shamrock Craft for Kids
Your 3D shamrock craft is now complete and ready to show off! You can hang them up on a mantle, use them as decorations on your St. Patrick’s Day table, or give them as gifts to friends and family.
Hopefully you thought this was a fun and easy activity and you and your kids enjoyed it. It’s a great way to celebrate St. Patrick’s Day, but it also helps develop fine motor skills and creativity. So, grab your materials and get crafting more shamrocks!

For more homeschooling inspiration, tips and encouragement, make sure to follow KFH on Facebook, Pinterest, Instagram and Twitter, and subscribe to our Newsletter for some FREE GOODIES!
Forest Rose is a God Loving, Blessed Wife, & Mama to 3 girls. She’s passionate about lifting moms out of the trenches that are discouraged, overwhelmed, or feeling alone or isolated. Her hope is to point them to Christ and equip them to rise up with a newfound hope and joy within, that He alone can provide. Besides blogging, she also loves to create printables!


Leave a Reply